Making A Comic Page: From Script to Final Art
Last year, my book agent asked me to share how I break down a comic page for her blog. I love to hear other creator’s processes, so I was happy to do it. I figured I’d share that with you here.
Step 1: The Script
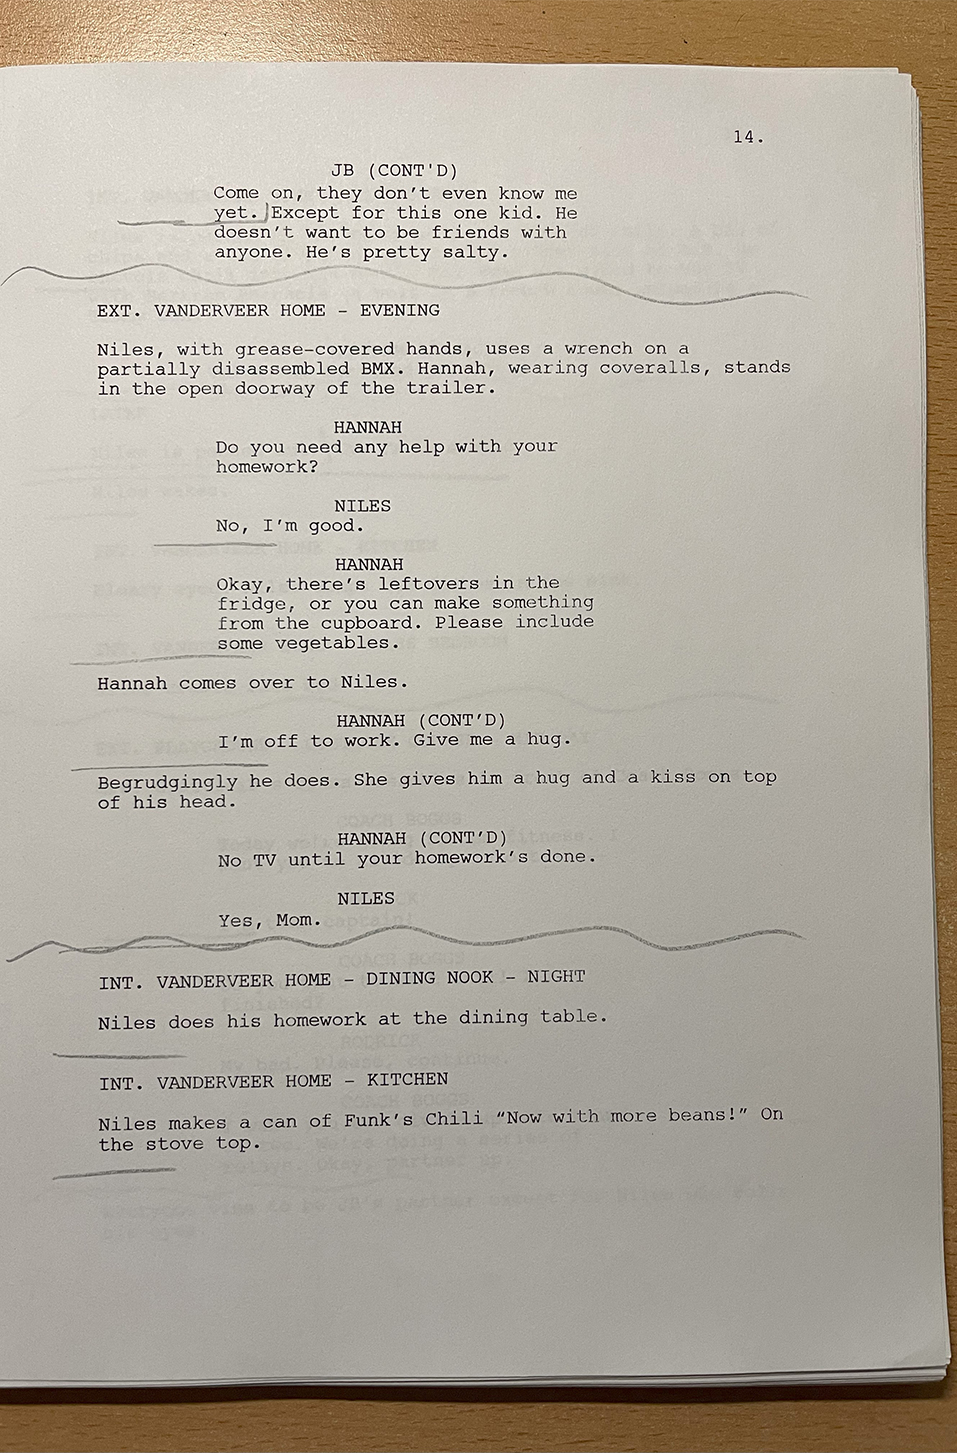
I write my stories like a screenplay. My only concern at this stage is telling a good story. This involves multiple drafts, revisions, and feedback. Once the story is finalized I print out the script and go through and break it down by panels and pages.
When figuring out page breaks, I don’t include more than one scene on a comic page.
Step 2: Thumbnails
I thumbnail in a cheap notebook. This does two things. One, it enables me to work small and keep it to essential details only. I’m not working digitally here, so I can’t zoom in and add bits that are unnecessary at this point.
Two, I’m able to draw the left and right pages next to each other as they’ll appear in the final book. When thumbnailing, I’m thinking about page turns and how the side-by-side pages work together. Is it clear what’s going on?
Clarity above all. I like a gorgeous spread as much as the next guy but I am here to service the story, not make a cool pinup.
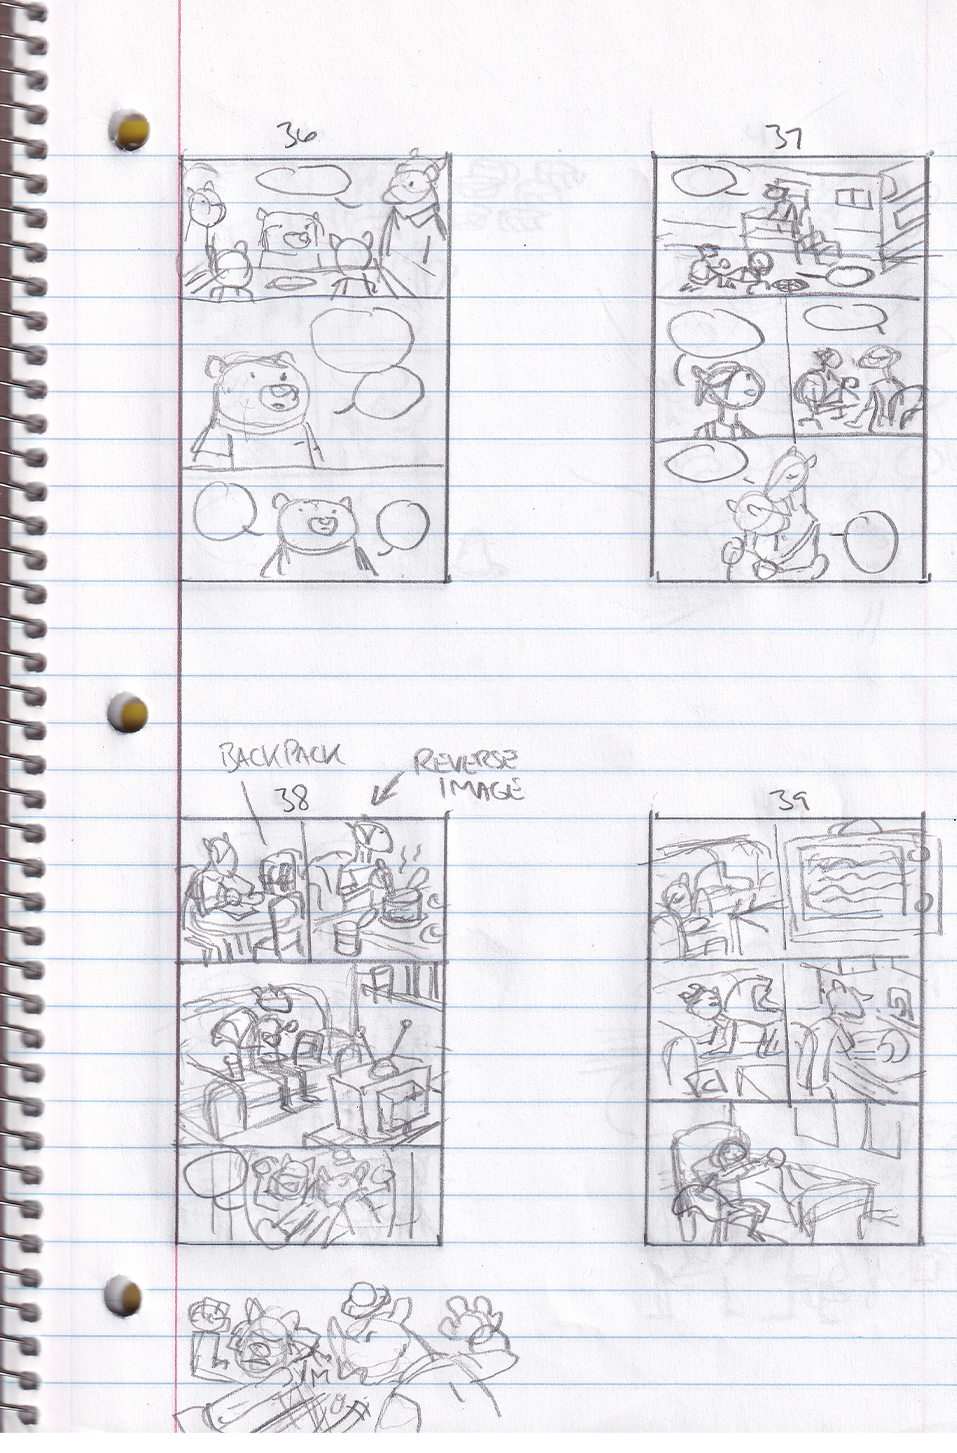
For me, the thumbnailing is probably the most exciting part. This step determines how the story is presented to the reader. I occasionally make changes when working on the final art but for the most part, this is where the visual storytelling is determined.
Keeping my art style and the print size of the book in mind, I try to keep a page to five panels or less. I also don’t want a text-heavy page or panel. A big block of text is an express ticket to skimsville.
Stage 3: Lettering
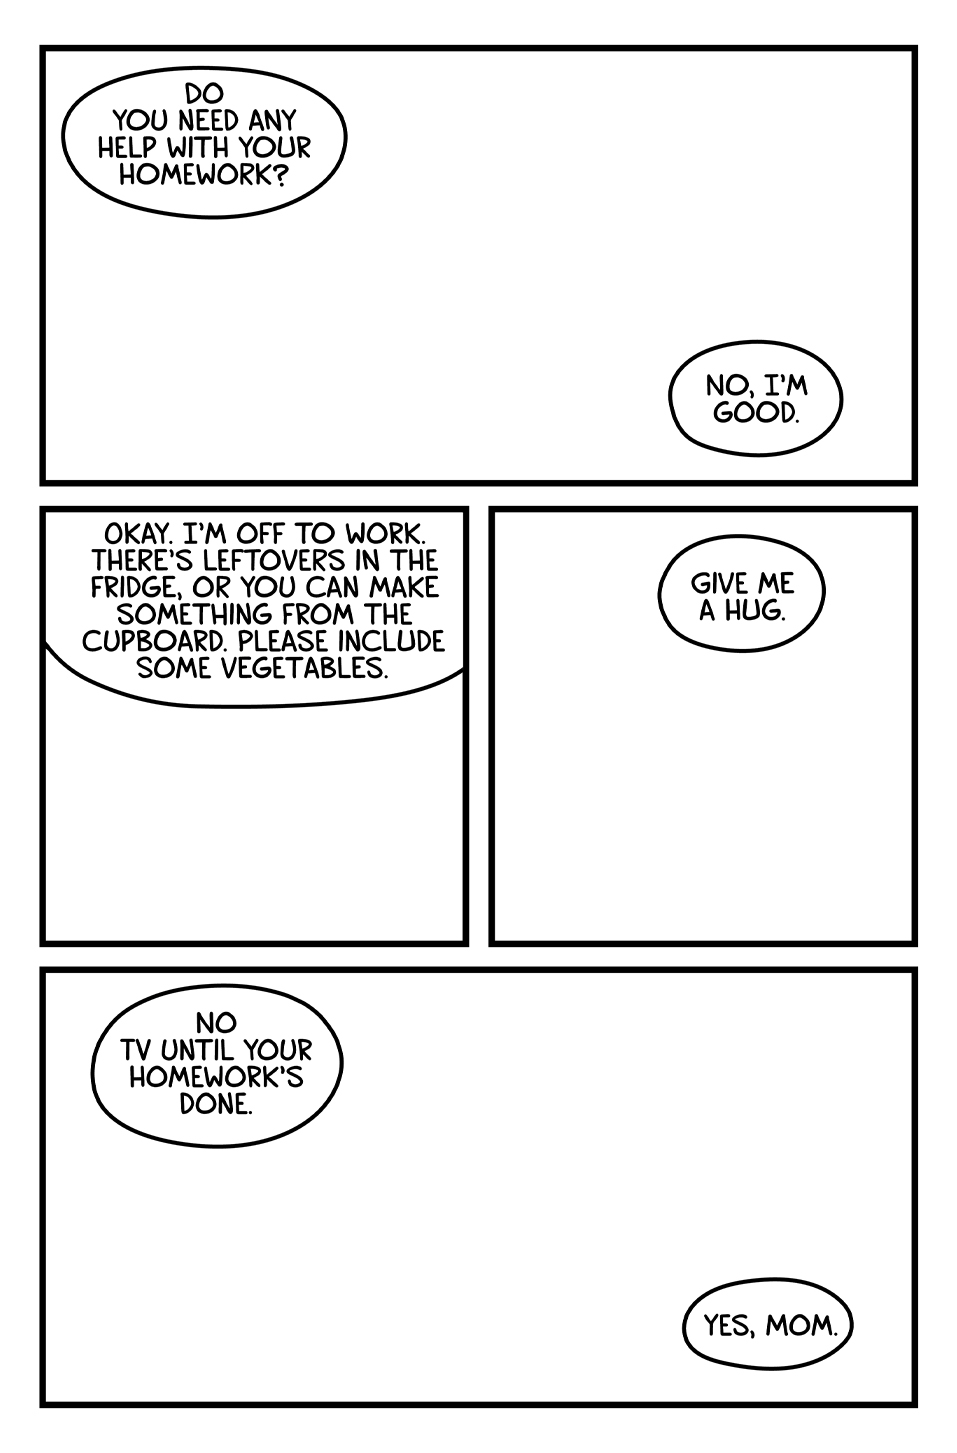
The common practice in comic making is to do the lettering after the art is completed. I do it first. I include word balloons in my thumbnails to make sure the order of the balloons is clear to the reader and also to not have the tails of the balloons crisscrossing.
Doing the lettering before the art allows me to know exactly how much space I have for the art. That world balloon in the second panel takes up quite a bit of real estate. Knowing that in advance saves me from drawing something essential that could have been covered up. I can move the balloons around later on the final art if I find something that works better but doing it first ensures that it works.
Step 4: Pencils
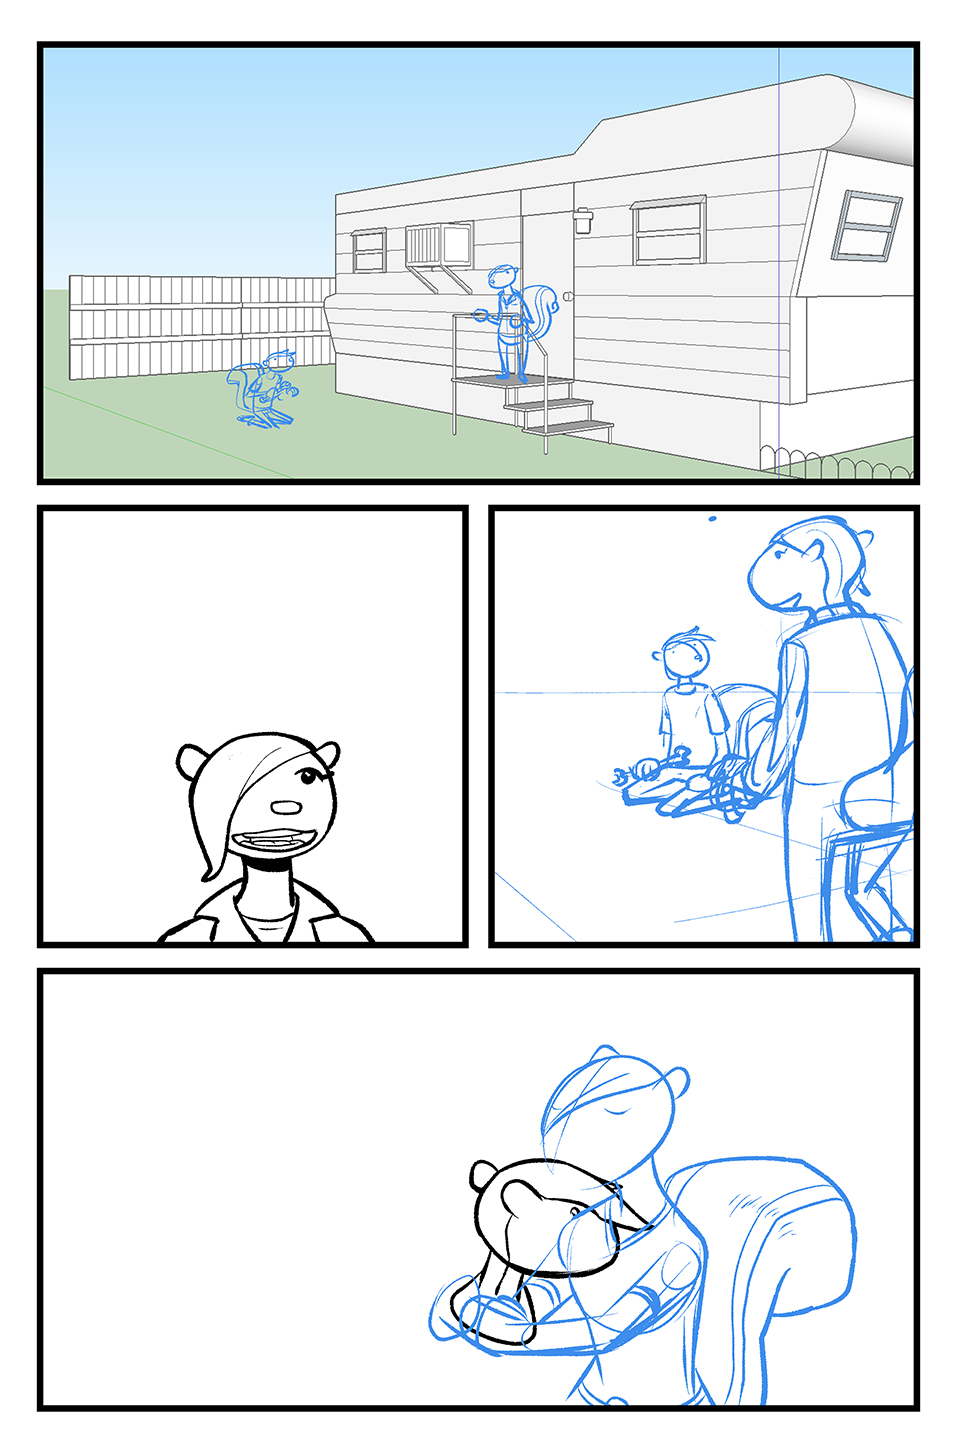
Next are “pencils”. I draw in Clip Studio Paint so the line between pencils and inks is often blurred. I still work out some things that are more complicated for me in a rough pencil layer. I find though, the further I get into the book, the more I just work it out in the “inks”. That’s one of the benefits of working digitally.
You can see, I didn’t have much in the way of pencils on this page. I went straight to ink in the second panel. The trailer in the first panel was created with SketchUp. Using a 3D model also enables me to quickly try out different angles and use the one that works best.
Stage 5: Inks
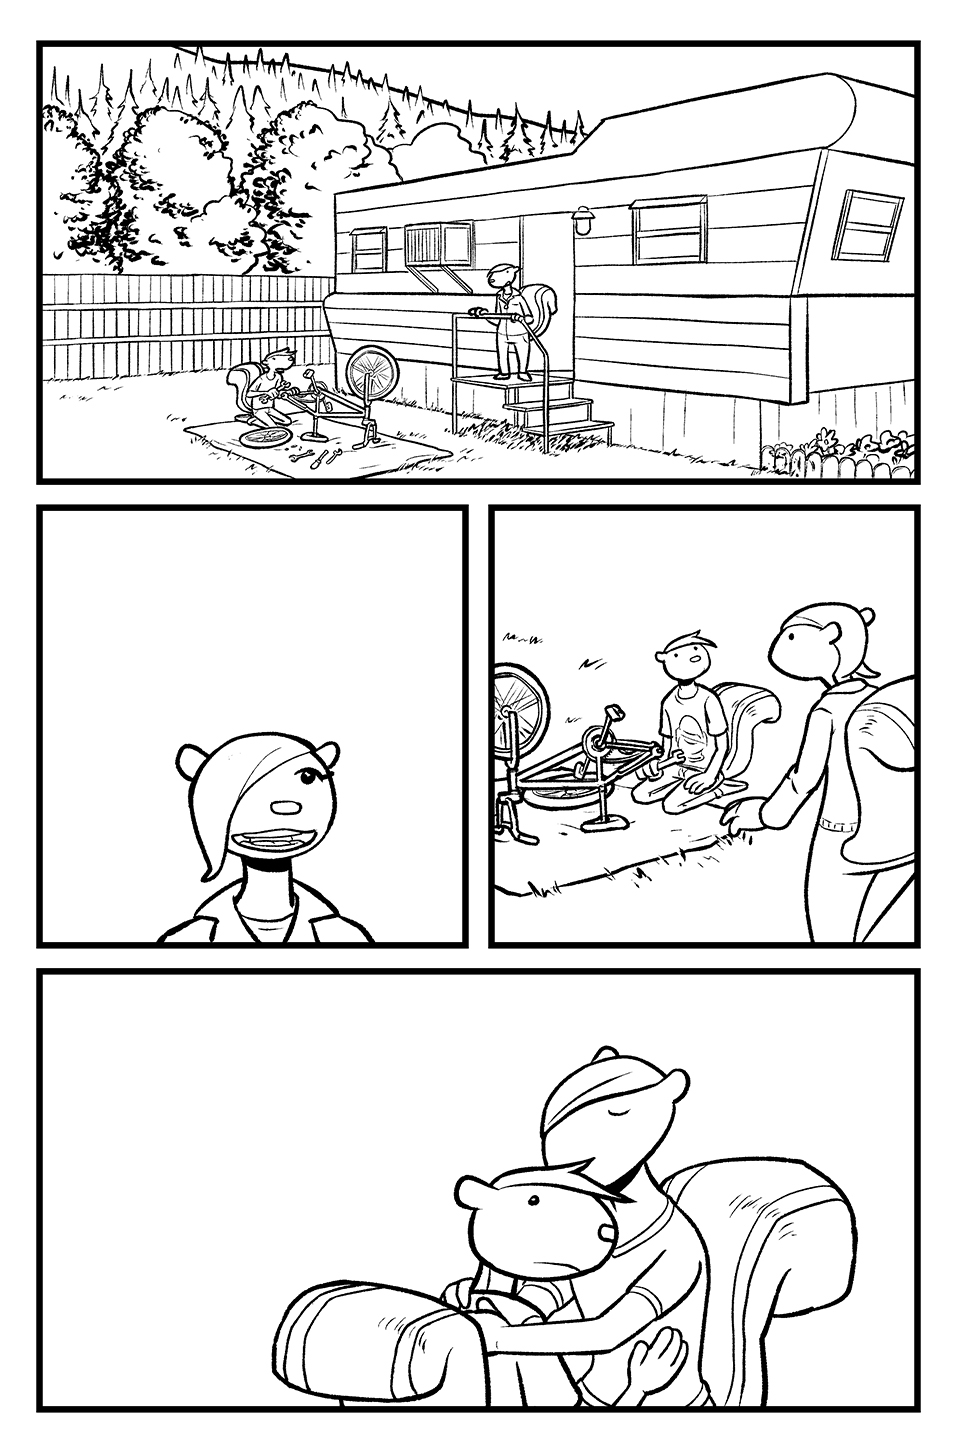
Here are a few extras in my process not covered above. If I have a location that’s going to be used a fair amount, I’ll make a model of it in SketchUp. It’s fairly easy to use and you can still download the 2017 version for free.
If there is a clear establishing shot, you don’t necessarily need backgrounds in every panel.
I like it when I’m able to create a page with no words and the storytelling is only pictures. But when there are no words on a page, the reader may rush through it. So sometimes I’ll add a line of dialogue that wasn’t in my original script if I want to slow the reader down.
I want to keep things visually interesting. I default to medium shots so I remind myself to mix it up with a combination of wide, medium, and close-up shots.
And here’s the final page with colors.
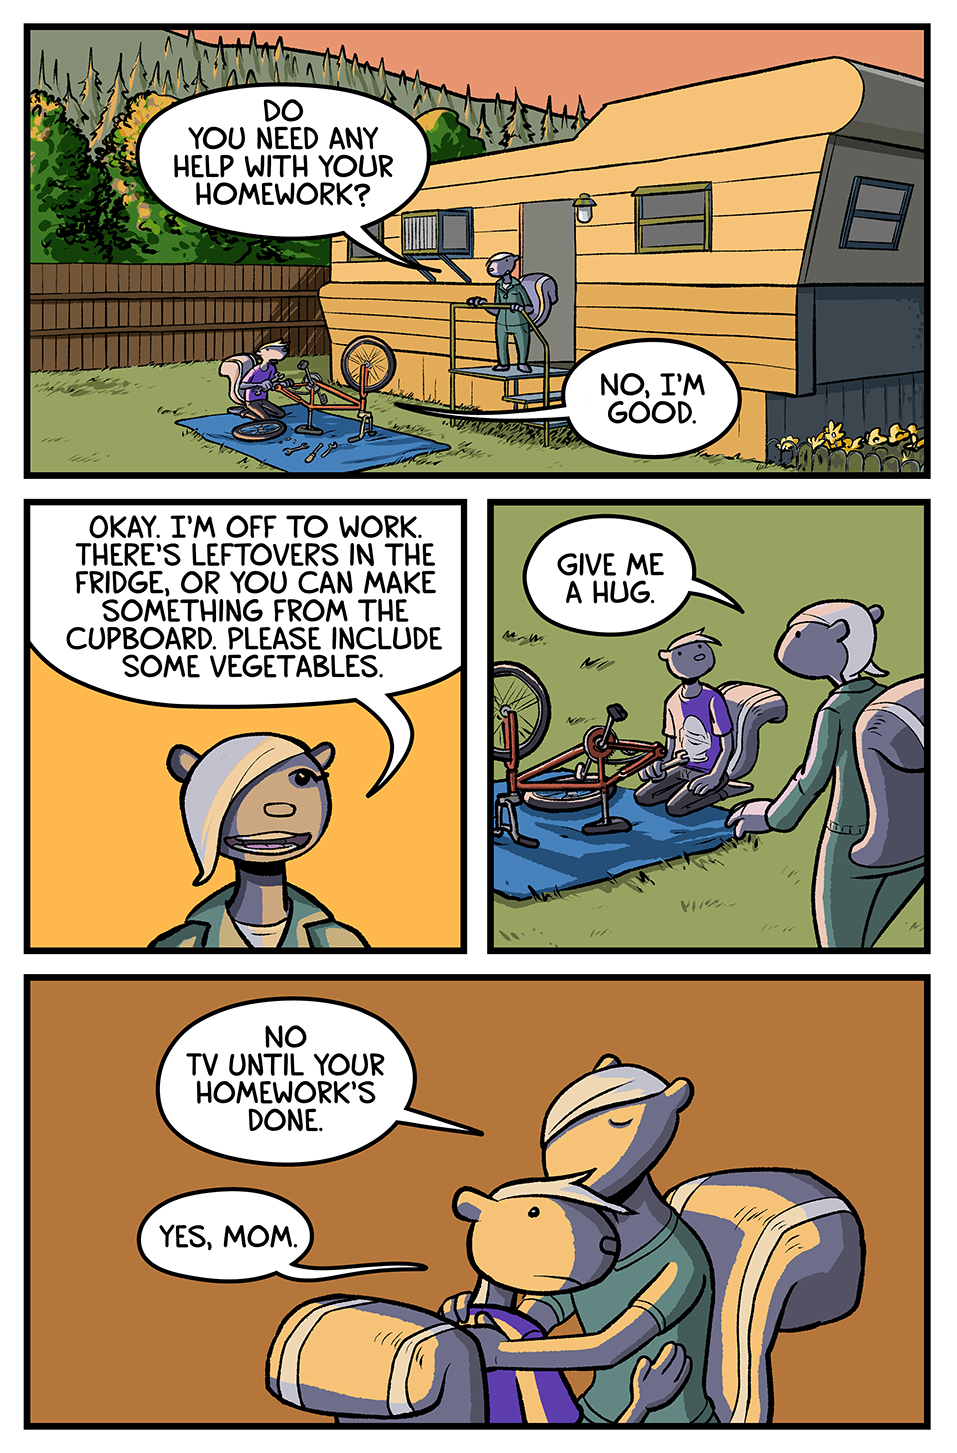
And that’s how I break down a page.
Favorite Thing I Drew This Month
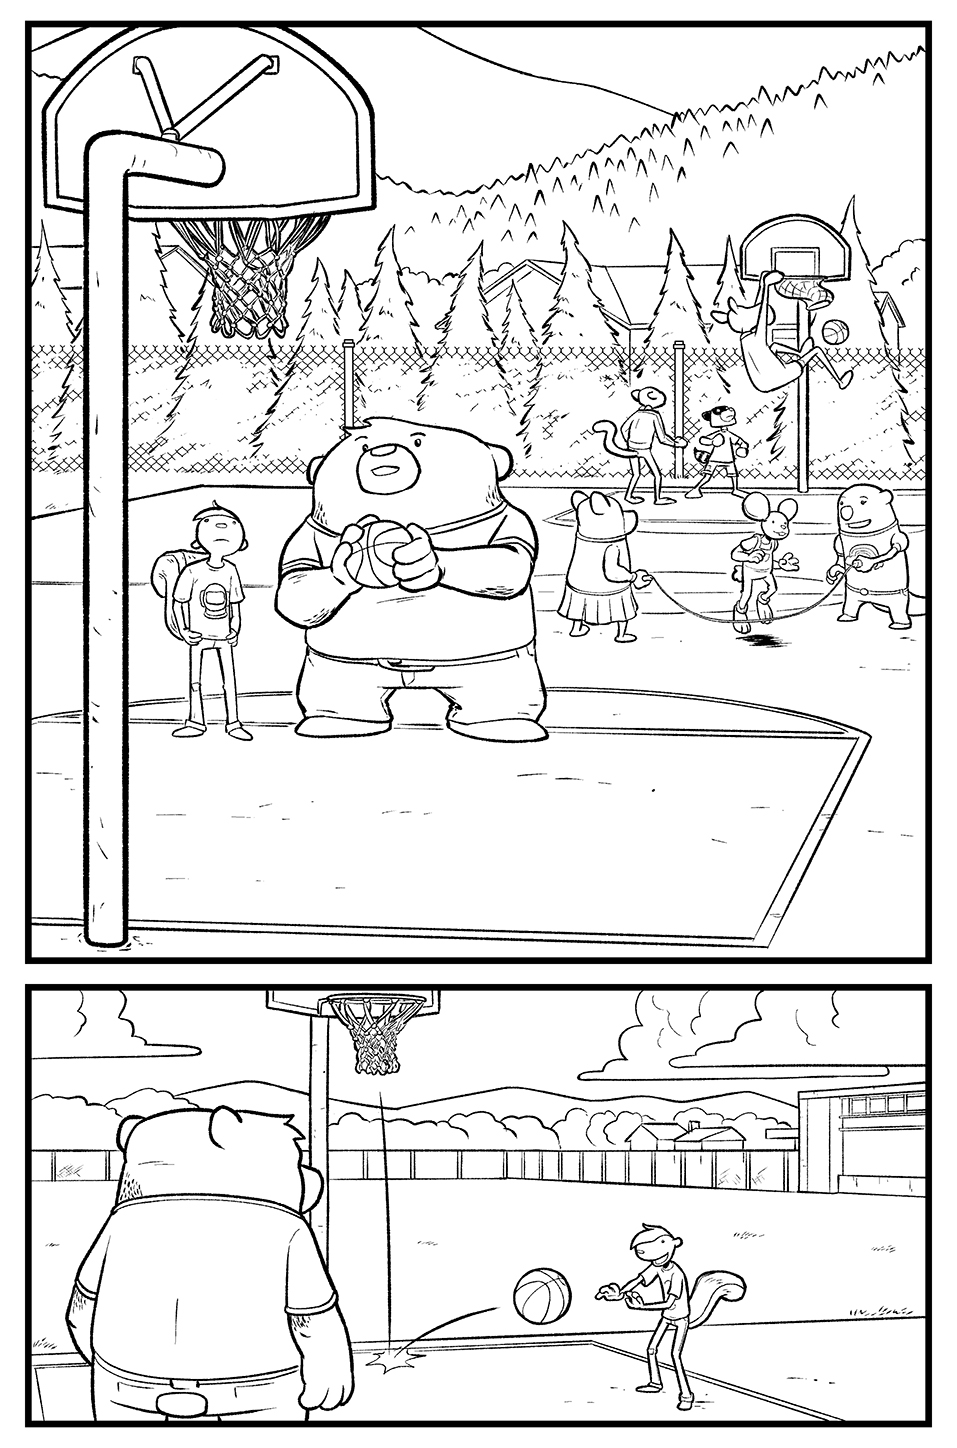
And by “drew” I totally mean traced those basketball nets. I know you’ve been dying to see a moose dunk a basketball. Glad I could help you cross that off your bucket list.
Favorite Thing I Didn’t Draw
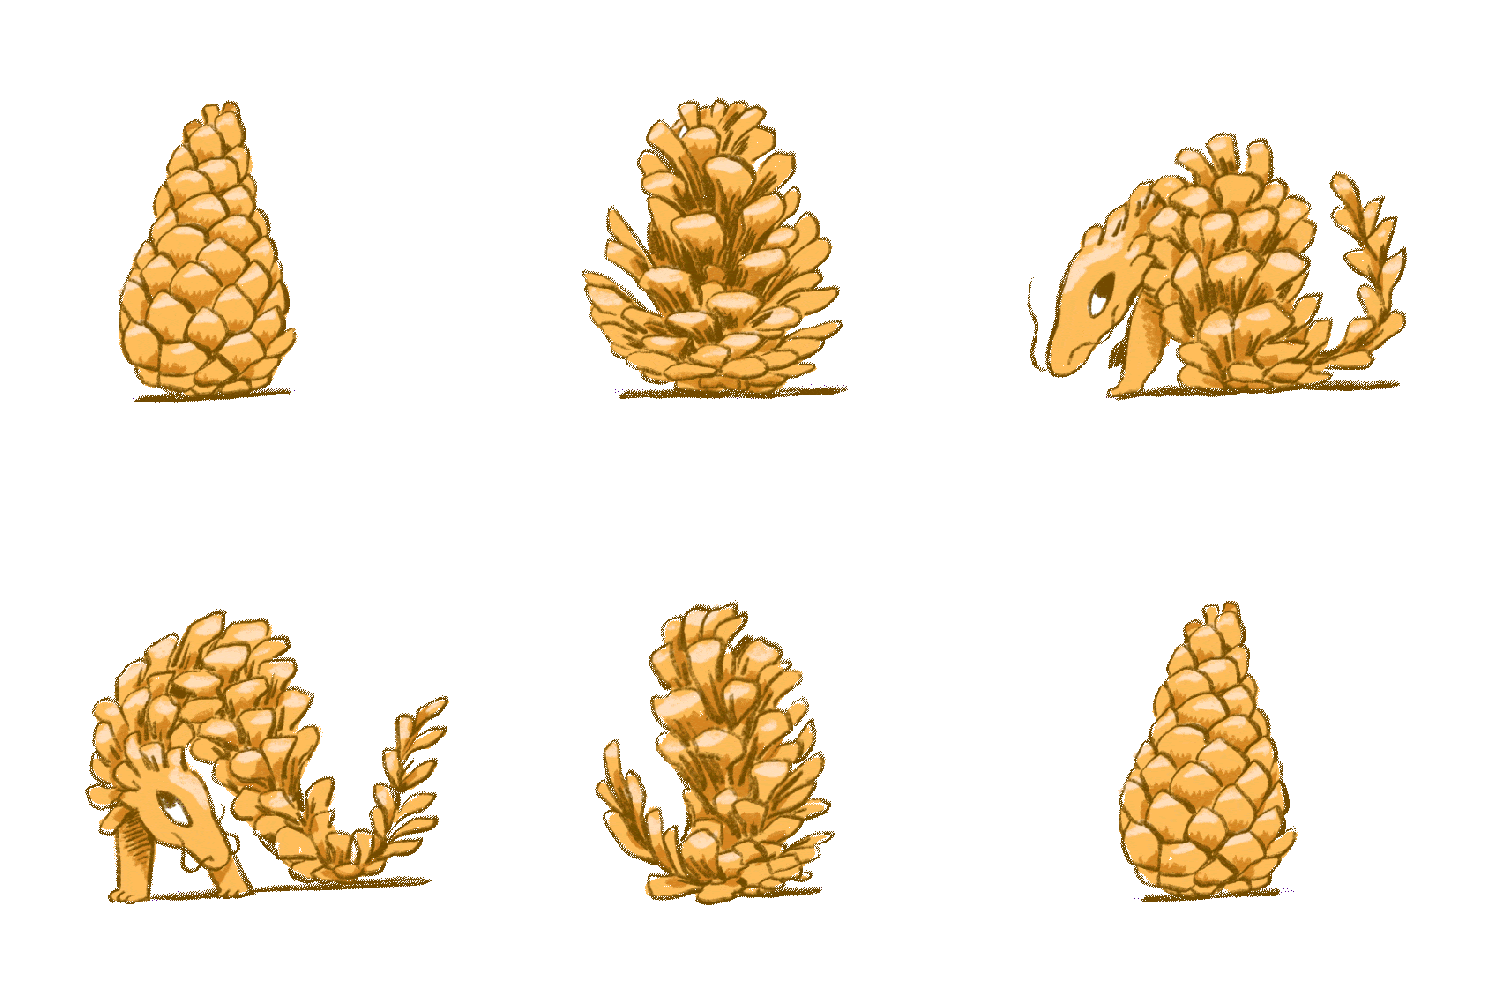
It’s the year of the dragon and check out this wood dragon artist Rina Jost drew.
Family Stuff
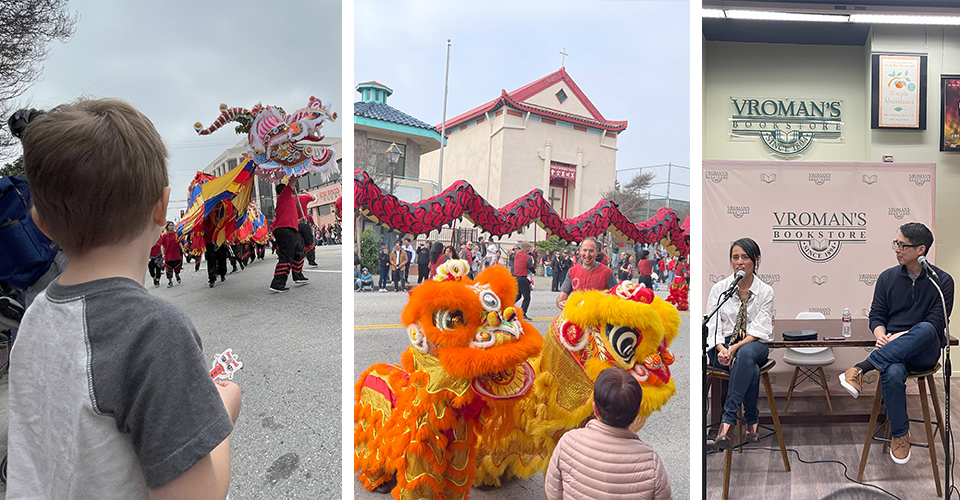
We celebrated the Chinese new year by attending the Chinatown dragon parade. It’s becoming a tradition. Before the start, Sophia got takeout from one of the restaurants while I procured confetti fireworks and a case of snap pops. Yes, a case, not a few measly boxes. It was a fun way to watch the parade and spend the afternoon.
I also went to a book signing and discussion with Gene Luen Yang and Leuyen Pham for their graphic novel, Lunar New Year Love Story. If you have authors you enjoy, I highly recommend going to an instore event. I’ve enjoyed everyone I’ve gone to and you’ll hear stories you wouldn’t anywhere else.
As for the book, it is fantastic. I know it’s only March but it’s going to be hard for another book to knock this out for my favorite book of the year.
Thanks for reading!
Did you enjoy reading? Subscribe to The Kid’s Comics Creator newsletter and get articles like this directly in your inbox the first and third Wednesday of the month.
